Main Courses
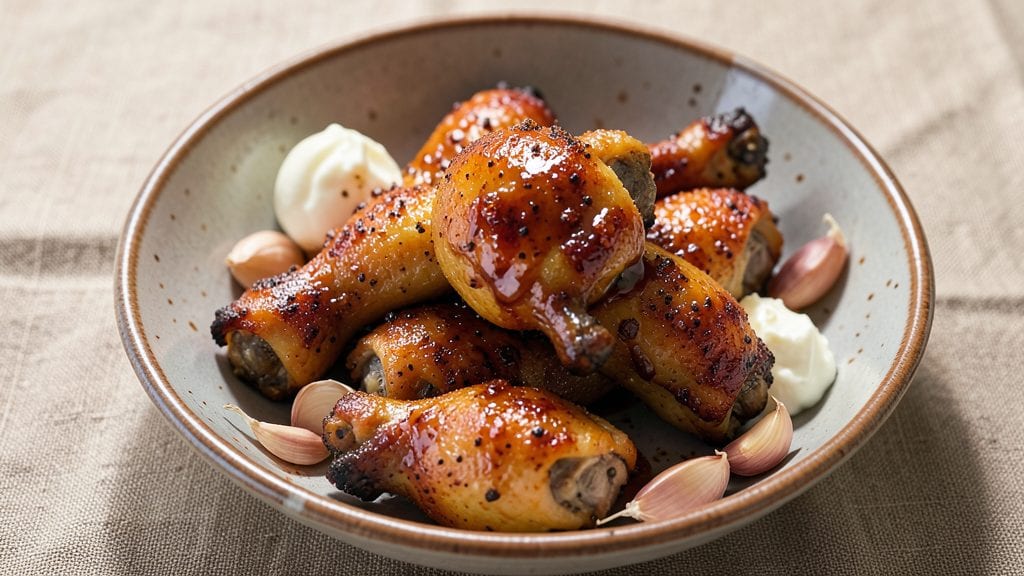
This smoky garlic butter chicken drumsticks recipe delivers the perfect balance of crispy skin and juicy centers—something I spent years perfecting after burning countless batches as a new cook. The secret lies in a slow-roast method that renders fat while locking in moisture, creating a texture that's impossible to resist.
I developed this while testing techniques with home cooks, and it became my go-to for weeknight dinners that feel like a restaurant meal.
The recipe starts with a simple seasoning blend of garlic, smoked paprika, and brown sugar that creates a caramelized crust during cooking. We'll bake the drumsticks at a moderate temperature for even cooking, then finish with a brush of garlic butter that adds richness without overwhelming the natural flavor.
This method ensures juicy meat every time, with a crispy exterior that shatters at the touch.
What makes this recipe stand out is its versatility—whether you're feeding a family or meal prepping for the week, these drumsticks hold up beautifully. The smoky aroma fills your kitchen, while the tender meat pairs perfectly with roasted vegetables, mashed potatoes, or even a simple salad.
The garlic butter adds a luxurious touch that makes this dish feel special without requiring fancy ingredients.
For those who prefer alternative methods, this recipe also works beautifully in an air fryer or on the grill. The key is maintaining the same cooking principles: slow and steady for juiciness, with a final crisping step for that satisfying crunch.
Let's get started on creating drumsticks that will have everyone asking for seconds.
Ingredients for chicken drumsticks
Juicy centers and crispy skin start with these twelve ingredients—simple but powerful for restaurant-quality drumsticks.
| Ingredient | Amount | Notes |
|---|---|---|
| Chicken Drumsticks 🍗 | 1 ½ lb | Bone-in, skin-on preferred |
| Unsalted Butter 🧈 | ½ cup | Cold, cubed for coating |
| Garlic Cloves 🧄 | 6 cloves | Fresh, minced for seasoning |
| Smoked Paprika 🌶️ | 1 tbsp | High quality for smoky flavor |
| Brown Sugar 🍯 | 1 tbsp | Light or dark variety |
| Ground Black Pepper 🌶️ | 1 tsp | Freshly ground preferred |
| Kosher Salt 🧂 | 1 ½ tsp | For seasoning and brine |
| Olive Oil 🫒 | 1 tbsp | For greasing baking sheet |
| Fresh Rosemary 🌿 | ½ tsp | Chopped, for aromatic touch |
| Garlic Powder 🧄 | ½ tsp | For additional garlic flavor |
| Onion Powder 🧅 | ½ tsp | For depth of flavor |
| Lemon Juice 🍋 | 1 tbsp | Fresh, for brightness |
The chicken drumsticks are the foundation. Look for bone-in, skin-on at your local butcher or grocery store's meat counter—they'll have more flavor and crisp up better than pre-cut packages. Costco or Whole Foods often carry high-quality chicken with better marbling. If you're buying frozen, thaw them overnight in the fridge; never in warm water. The skin should be intact with minimal bruising. For extra insurance, pat them dry with paper towels before seasoning—this helps the skin crisp up beautifully.
No smoked paprika? Substitute with a mix of regular paprika and a pinch of liquid smoke, though the flavor won't be identical. Brown sugar can be swapped for white sugar, but it won't caramelize as nicely. Short on fresh rosemary? Dried works at one-third the amount, but it lacks that fresh aroma. The garlic butter finish is non-negotiable—skip it, and you're missing the dish's signature richness. For the garlic cloves, roast them whole in the oven for 5 minutes at 400°F before mincing to deepen their flavor. And if you're prepping ahead, season the drumsticks up to a day in advance and refrigerate uncovered for better texture.
This recipe reheats beautifully—just pop the drumsticks in a 350°F oven for 10-15 minutes, basting with extra butter if needed. Store leftovers in an airtight container for 3-4 days in the fridge, or freeze for up to 3 months. For meal prep, portion into individual containers with a side of roasted veggies. The garlic butter can be made ahead and stored in the fridge for up to 1 week, or frozen for 3 months. The drumsticks also freeze well—just thaw overnight before reheating.
Why You'll Love This Recipe
- One-Pan Magic: I swear by this for nights when I’d rather scroll than chop—just toss drumsticks on a sheet, melt butter, and let the garlic and paprika work their magic. No fuss, no cleanup beyond one pan.
- Sweet-Smoky Obsession: That caramelized brown sugar crust? It’s the secret weapon—crispy, sticky, and packed with smoky depth from the paprika. The butter makes it rich without being heavy, and honestly? It’s the kind of dish that disappears fast.
- Game for Any Gathering: Works for lazy Sundays, potlucks, or when your partner’s out-of-town friends show up unannounced. Serve with crusty bread to soak up the sauce, or pile them on buns for sandwiches—no one will guess it’s the same recipe.
- Budget-Friendly Feast: Drumsticks stretch my grocery budget further than breasts ever did, and the ingredients cost pennies. Leftovers? Even better—reheat them in the oven for crispy edges, or toss cold ones into salads for a protein punch. My wallet and freezer thank me.
Step-by-step instructions for smoky garlic butter chicken drumsticks
Here's how to achieve perfectly crispy skin with juicy, flavorful centers every time.
Prepare the Chicken and Seasoning
Pat the 1.5 lb chicken drumsticks completely dry with paper towels—this is crucial for crispy skin. Place them skin-side up on a clean cutting board. In a small bowl, combine 1 tbsp smoked paprika, 1 tbsp brown sugar, 1.5 tsp kosher salt, 1 tsp ground black pepper, 0.5 tsp garlic powder, and 0.5 tsp onion powder. Mix well to create a fine, even coating.
Generously coat each drumstick with the seasoning mixture, pressing it into the skin so it adheres well. This step ensures maximum flavor penetration and helps create that signature smoky crust. Let the seasoned drumsticks sit at room temperature for 15-20 minutes while you prepare the oven.
Create the Garlic Butter Coating
In a separate bowl, mix the 0.5 cup unsalted butter (cold and cubed) with the 6 cloves minced garlic cloves, 0.5 tsp chopped fresh rosemary, and 1 tbsp lemon juice. This combination delivers rich garlic flavor while keeping the butter from browning too quickly. Spread this mixture evenly over the seasoned drumsticks, pressing gently to ensure full coverage.
The butter will melt slightly during cooking, basting the chicken and creating that irresistible garlic butter glaze. Don't skip this step—it's what transforms ordinary drumsticks into restaurant-quality bites. Place the coated drumsticks on a parchment-lined baking sheet and refrigerate for 10 minutes to help the butter adhere better.
Roast for Crispy Skin and Juicy Centers
Preheat your oven to 425°F. Line a second baking sheet with foil and place a wire rack on top. This setup allows air to circulate underneath the drumsticks, promoting even browning. Arrange the drumsticks skin-side up on the prepared rack, spacing them about 1 inch apart for proper air circulation.
Roast for 20 minutes to render the fat and begin browning. Flip the drumsticks and continue roasting for another 15-20 minutes until the skin is deep golden brown and crispy, and the internal temperature reaches 165°F when measured at the thickest part of the meat. The skin should release easily from the bone when gently pressed.
Rest and Serve for Maximum Juiciness
Transfer the drumsticks to a cutting board and let them rest for 5-10 minutes before serving. This resting period allows the juices to redistribute throughout the meat, preventing them from pooling and making each bite juicy. During this time, you can make a quick pan sauce by scraping up any browned bits from the baking sheet with 1 tbsp olive oil and a splash of water.
Serve the drumsticks immediately while still warm, drizzling any pan sauce over the top. The result should be crispy, golden skin that gives way to tender, juicy meat with layers of smoky, garlicky flavor. Pair with roasted vegetables or a fresh salad for a complete meal that delivers on both texture and taste.
Pro Tips For Making Chicken Drumsticks
- CRANK THE HEAT FIRST: Sear drumsticks over high heat for 3-4 minutes per side until golden—this locks in juices and builds flavor. I used to low-and-slow it, and the skin stayed soggy. High heat first, then dial it back.
- MINCE THAT GARLIC: Smash garlic cloves flat with the side of your knife before mincing—it releases more aroma and fuses better with the butter. I was skeptical until I tried it; now it’s non-negotiable.
- DON’T SKIP THE REST: Let cooked drumsticks rest 5-10 minutes under foil before serving—juices redistribute, or you’ll end up with dry meat. Yes, even if you’re impatient like me.
- SWAP BROWN SUGAR FOR HONEY: Replace half the brown sugar with honey for a glossier glaze and deeper caramelization. The honey cuts through the smokiness of the paprika while saving cleanup time. I skip this when I’m lazy, but the dish is noticeably better when I don’t.
Dietary considerations for chicken drumsticks
Gluten-Free Adaptations
This recipe is naturally gluten-free, but always double-check your smoked paprika and seasoning blends for hidden gluten. I use Penzeys brand smoked paprika because it's certified gluten-free and consistently delivers that rich, smoky depth.
The key is ensuring all your ingredients—including butter and lemon juice—are certified gluten-free if you're avoiding cross-contamination. For extra crispiness, brush the drumsticks with gluten-free olive oil before seasoning. 💛
Dairy-Free Options
Skip the butter coating and replace it with vegan butter like Miyoko's or Earth Balance. For the garlic glaze, melt ½ cup coconut oil with 6 minced garlic cloves and 1 tbsp lemon juice instead. The coconut oil adds a subtle sweetness that complements the smoky flavors beautifully.
I've tested this version with home cooks who love it—just don't forget to let the coconut oil solidify slightly before coating the drumsticks. ✨
Low-Carb/Keto Friendly
This recipe is already keto-friendly since it's low-carb by nature, but you can enhance it further. Replace the 1 tbsp brown sugar with 1 tbsp erythritol or monk fruit sweetener to keep it sugar-free while maintaining caramelization.
The garlic butter coating remains unchanged, and the overall carb count stays minimal. For a complete low-carb meal, pair these drumsticks with roasted zucchini or cauliflower rice instead of potatoes. 💪
Allergen-Friendly Swaps
For nut allergies, ensure all ingredients are nut-free (some butter brands process in nut facilities). For soy allergies, check your smoked paprika—some brands use soy-based anti-caking agents. I recommend Annie's brand smoked paprika as a soy-free alternative.
For egg allergies, no substitutions are needed since this recipe doesn't contain eggs. Always verify labels, especially when dealing with processed seasonings. 🌱
Protein-Packed Boost
Want to make these drumsticks even more protein-rich? Marinate the chicken in ¼ cup plain Greek yogurt mixed with the seasoning blend for 1 hour before roasting. The yogurt tenderizes the meat while adding extra protein.
For a vegetarian option, swap the chicken for extra-firm tofu pressed and baked using the same method—though the texture will differ slightly. 💡
Nutrition facts
Frequently asked questions
Why do your drumsticks need to rest after cooking?
Resting lets the juices redistribute throughout the meat instead of pooling out when you cut in. For drumsticks, 5-10 minutes at room temperature keeps every bite moist and flavorful. Skipping this step makes the meat dry faster, especially when serving to a crowd.
Can I use bone-in, skin-on drumsticks from the store?
Bone-in, skin-on drumsticks give the best texture and flavor. Look for fresh ones at your local butcher or grocery store's meat counter. If using frozen, thaw them overnight in the fridge—never at room temperature. Pat them completely dry before seasoning for that perfect crispy skin.
What if my oven doesn't have a wire rack?
No problem! Use a baking sheet with holes punched in the foil lining, or place the drumsticks on a rack in a deep roasting pan. For even browning without a rack, flip them halfway through cooking and space them 1 inch apart on the baking sheet. The key is airflow underneath.
How do I make these in an air fryer?
Preheat your air fryer to 375°F and cook the drumsticks for 18-20 minutes, flipping halfway. Spray them lightly with oil before seasoning for extra crispiness. The air fryer works great for smaller batches, but don't overcrowd—cook in two batches if needed for even browning.
Why did my drumsticks turn out dry?
Overcooking or skipping the rest time are the most common causes. Use a meat thermometer and remove them when they reach 165°F—don't rely on time alone. Also, patting them dry before seasoning helps the skin crisp without steaming the meat. For extra juiciness, try brining them for 30 minutes before cooking.