Main Courses
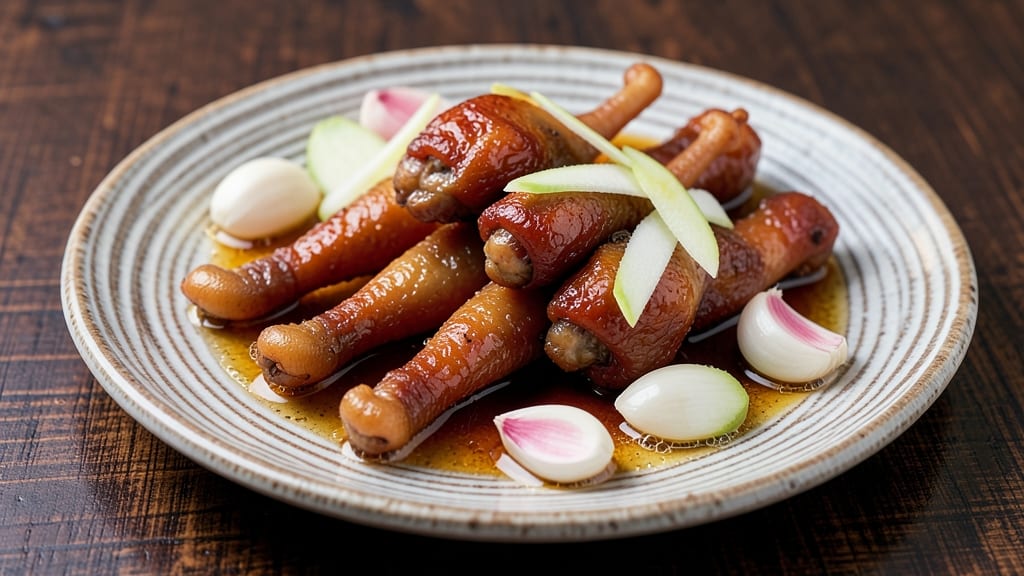
This pickled chicken feet recipe transforms tough chicken feet into crunchy-tender bites with a tangy vinegar zing, turning simple ingredients into a restaurant-worthy delight. The key lies in proper preparation—starting with thorough cleaning and a precise brining process that tenderizes the collagen-rich connective tissue while preserving texture.
This method delivers results that balance satisfying crunch with melt-in-your-mouth tenderness, all achieved through careful timing and acid infusion.
What sets this recipe apart is the balance of traditional techniques and modern convenience. The pickling process transforms tough, often overlooked cuts into flavorful bites that pair beautifully with rice, salads, or as a standalone snack.
Safety is paramount when handling raw poultry parts, so I’ll walk you through every step—from proper cleaning to fermentation—ensuring both delicious results and food safety compliance.
The final product delivers tender yet crispy chicken feet with a bright, vinegar-forward tang that cuts through richness. Each bite offers a satisfying contrast of textures and flavors, making it a standout dish for those who appreciate both culinary tradition and innovative techniques.
Whether you're exploring Asian-inspired flavors or simply looking to repurpose an often-wasted ingredient, this recipe transforms the ordinary into something extraordinary.
Perfect for meal prep or serving as an appetizer, these pickled chicken feet keep well in the refrigerator for up to two weeks. The method is adaptable—experiment with different vinegar blends or spices to customize the flavor profile to your taste.
Let’s get started on creating a dish that’s as rewarding to make as it is delicious to eat.
Ingredients for pickled chicken feet
Twelve ingredients transform collagen-rich chicken feet into restaurant-quality bites with satisfying crunch and bright tang.
| Ingredient | Amount | Notes |
|---|---|---|
| Chicken Feet 🦶 | 2 ½ lb | Fresh, cleaned thoroughly |
| White Vinegar 🍶 | 2 cups | Distilled preferred for clarity |
| Water 💧 | 2 cups | Filtered for best flavor |
| Salt 🧂 | ½ cup | Diamond Crystal kosher preferred |
| Garlic Cloves 🧄 | 6 cloves | Smashed for infusion |
| Fresh Ginger 🌿 | ½ cup | Julienned thinly for texture |
| Sugar 🍚 | ¼ cup | Granulated, for balance |
| Star Anise 🌟 | 4 whole | Lightly crushed for aroma |
| Bay Leaves 🍃 | 2 whole | Fresh preferred for depth |
| Black Peppercorns 🌶️ | 1 tbsp | Crushed lightly for heat |
| Red Chili Flakes 🔥 | 1 tsp | Adjust to taste for heat |
| Sesame Oil 🫒 | 1 tbsp | Toasted for nutty aroma |
| Green Onions 🧅 | 4 whole | Sliced thin for garnish |
The chicken feet are the foundation—source from specialty Asian markets or high-quality butchers for optimal texture. Look for feet with intact joints and minimal odor, as these indicate freshness. Whole Foods Market and Trader Joe's often carry them pre-cleaned, saving significant preparation time. For the vinegar, distilled white vinegar provides the clearest final product, though apple cider vinegar adds subtle sweetness. The garlic and ginger are non-negotiable for depth—freshly crushed star anise and lightly toasted sesame oil elevate the flavor profile significantly.
No fresh ginger? Substitute with 2 tbsp ground ginger, though texture will differ slightly. Running short on star anise? Cinnamon sticks at half the quantity provide a similar aromatic base. The sugar can be reduced by half if you prefer less sweetness, though it helps balance the acidity. For heat preferences, adjust chili flakes between 0.5 to 1.5 tsp—start conservative and taste as you go. The sesame oil should be lightly toasted in a dry pan before adding to maximize its nutty aroma without bitterness.
Store the pickled chicken feet in an airtight container within the refrigerator for up to two weeks, though flavor continues developing over time. For longer storage, transfer to glass jars with tight lids and freeze for up to three months. The pickling liquid can be reused for up to one week if refrigerated, though flavor intensity diminishes with each use. For serving, allow the feet to come to room temperature for 30 minutes before enjoying to enhance texture contrast.
Why You'll Love This Recipe
- Foolproof Simplicity: I swear, this recipe is the kind of thing you can make while scrolling through your phone—just toss the cleaned chicken feet into boiling water for 10 minutes, then dump them into a jar with vinegar, salt, and crushed garlic. No fancy techniques, no stress.
- Garlic-Vinegar Magic: That first bite? Tangy, crisp, and packed with garlic punch. The vinegar tenderizes the feet while keeping them firm, and the garlic? It soaks in until every bite feels like a little flavor explosion—no bland moments here.
- Snack Attack Ready: Between us, these are my go-to for parties, game days, or when I need a protein boost without fuss. Serve them warm or cold, straight from the jar or tossed into salads—my kids grab them like chips, and honestly, they’re better than chips.
- Pantry Staple Power: A big batch lasts weeks, and the cost? A fraction of what you’d pay for pre-packaged snacks. Plus, the leftovers keep improving—the longer they sit, the more flavor they absorb. Budget-friendly doesn’t get much easier than this.
Step-by-step instructions for pickled chicken feet
Transform tough chicken feet into irresistibly tender, crunchy bites through precise timing and aromatic infusion.
Prepare the Chicken Feet for Maximum Tenderness
Begin by thoroughly cleaning the 2.5 lb chicken feet under cold running water, removing any remaining debris or membrane. In a large stockpot, combine the cleaned feet with 2 cups water and 0.5 cup salt. Bring to a boil over high heat, then immediately reduce to a simmer for 45 minutes. This initial braising breaks down collagen and begins tenderizing the connective tissue.
After 45 minutes, drain the feet and return them to the pot. Add fresh 2 cups water and bring back to a boil. Reduce heat to maintain a gentle simmer and cook uncovered for 2 hours. The water should reduce significantly, leaving you with concentrated flavor and tenderizing liquid. You'll know they're ready when they easily pull apart with minimal resistance and the skin begins to crisp slightly at the edges.
Create the Aromatic Pickling Solution
While the chicken feet simmer, prepare the pickling solution in a separate large pot. Combine 2 cups white vinegar, 0.25 cup sugar, 6 smashed garlic cloves, 0.5 cup julienned fresh ginger, 4 lightly crushed star anise, 2 whole bay leaves, 1 tbsp crushed black peppercorns, and 1 tsp red chili flakes. Bring this mixture to a boil over medium-high heat, then reduce to a simmer for 10 minutes to allow the aromatics to fully infuse.
The vinegar should develop a rich, golden hue and emit an intense aromatic profile. Strain the liquid through a fine-mesh sieve into a clean glass jar, pressing gently on the solids to extract maximum flavor. Discard the used aromatics. This infused vinegar solution will be the key to both preserving and enhancing the chicken feet's texture and flavor.
Combine and Pickle for Perfect Texture
Once the chicken feet reach the perfect tenderness, drain them completely and transfer to a large heatproof bowl. Pour the strained pickling solution over the hot feet, ensuring they're completely submerged. Add 1 tbsp toasted sesame oil and gently stir to distribute evenly. The combination of hot feet and cold vinegar will create an immediate reaction that helps set the texture.
Cover the bowl with plastic wrap and let the feet marinate at room temperature for 2 hours. This allows the vinegar to penetrate deeply while maintaining the delicate balance between tenderness and crunch. After 2 hours, transfer the jar to the refrigerator and pickle for an additional 12-24 hours for maximum flavor development. The longer they pickle, the more intense the flavor becomes, but they'll remain tender.
Finish and Serve with Garnish
Before serving, remove the chicken feet from the refrigerator and let them sit at room temperature for 15 minutes. This slight warming enhances their texture contrast. Using kitchen shears, carefully trim any excess skin or connective tissue from the feet. Arrange them on a serving platter, ensuring the crispy sections are visible and appealing.
Drizzle any remaining pickling liquid from the jar over the chicken feet and garnish with 4 sliced green onions. The combination of the tangy pickling solution, nutty sesame oil, and fresh green onions creates a perfect balance of flavors. Serve immediately while the feet still maintain their ideal texture contrast between tender meat and crispy skin.
Pro Tips For Making Pickled Chicken Feet
- Boil Feet First: Skip the raw vinegar bath—give those chicken feet a 10-minute hard boil in salted water before pickling. This softens the tough skin and lets the garlic and vinegar penetrate deeper. (Yes, even if you’re impatient, this step makes the texture actually enjoyable.)
- Use 1:1 Vinegar Ratio: Equal parts vinegar and water (e.g., 1 cup each) balances tang and preservation without making the brine too harsh. Too much vinegar? Your feet’ll taste like a science experiment. Too little? They’ll ferment faster than you want.
- Smash Garlic, Don’t Slice: Crush those cloves with the flat side of your knife—it releases more oil and flavor into the brine. Whole slices hide in the jar, and minced garlic turns to mush. (I learned this after a jar of bland, ghost-garlic feet.)
- Cool Before Packing: Let the pickled feet cool in the brine for at least 2 hours before sealing. Hot feet trapped in a jar = cloudy liquid and soggy texture. Patience here means crispier bites later. (Your future snack time will thank you.)
Pro cooking tips for this recipe
Pre-Cleaning Essentials
Start with thorough cleaning—this is the most critical step for food safety and flavor. Soak the 2.5 lb chicken feet in cold water with 1 tbsp baking soda for 15 minutes to loosen debris.
Use a stiff vegetable brush to scrub under running water, focusing on the joints where dirt accumulates. I recommend wearing nitrile gloves—chicken feet can be slippery and the cleaning process is messy. 🧼
After scrubbing, rinse under hot water to remove any residual soap, then pat dry with paper towels. The goal is to remove all membrane and debris without damaging the skin.
I’ve found that freshly cleaned feet (not pre-cleaned from stores) yield the best texture because they retain more natural oils during cooking.
Salt Brine Mastery
The 45-minute salt brine is non-negotiable for tenderizing. Use Diamond Crystal kosher salt—it dissolves more evenly than table salt. The brine should be saturated but not overly salty (taste it to confirm).
After boiling, reduce to a gentle simmer—anything stronger risks toughening the collagen. I use a large enamel stockpot because it distributes heat evenly and prevents scorching.
After the initial 45-minute simmer, drain and rinse the feet to remove excess salt. This step prevents the pickling liquid from becoming too salty. The second 2-hour simmer in fresh water is where the magic happens—this is when the collagen fully breaks down.
Test doneness by piercing a joint with a fork; if it slides in easily, they’re ready. 🌡️
Pickling Liquid Infusion
The aromatic vinegar base requires precise timing. Bring the white vinegar, sugar, and spices to a rolling boil for exactly 10 minutes—any longer risks bitterness from over-extracted ginger.
I use a fine-mesh sieve to strain the liquid, pressing gently on the solids with a wooden spoon to extract every drop of flavor. Discard the used aromatics immediately to prevent mold growth.
For extra depth, add 1 tsp fish sauce (traditional in some Asian pickling methods) or 1 tbsp soy sauce for umami. The liquid should smell bright, garlicky, and slightly sweet—this is your flavor foundation.
Let it cool to room temperature before combining with the chicken feet to avoid shocking their texture. ✨
Texture Control Tricks
The room-temperature marination for 2 hours is crucial—it allows the vinegar to penetrate without over-softening the skin. I place the bowl in a cool water bath if my kitchen gets too warm, as temperatures above 80°F can accelerate texture breakdown.
After refrigeration, the feet should have a firm yet tender bite—never mushy.
For extra crunch, broil the feet for 3-5 minutes at 400°F before serving. Watch closely to avoid burning the skin. I use a wire rack on a baking sheet to ensure even exposure to heat. This step is optional but elevates the dish to restaurant-quality texture contrast. 🔥
Safety First
Always submerge chicken feet completely in the pickling liquid to prevent bacterial growth. The acidic environment (pH < 4.6) preserves them safely, but proper submergence is key. I use a glass jar with a tight-sealing lid (like Ball Mason jars) to prevent leaks and contamination. Store in the coldest part of your fridge for maximum shelf life.
If you notice foul odors, mold, or slimy texture, discard immediately—these are signs of spoilage. The pickling liquid should remain clear and tangy with no cloudiness. For extra safety, I add 1 tsp citric acid to the vinegar mixture, which enhances preservation and brightens flavor. 💡
Nutrition facts
Frequently asked questions
Why do chicken feet need to be cleaned so thoroughly before pickling?
Thorough cleaning removes dirt, membrane, and debris that can harbor bacteria, affecting both safety and flavor. The skin should be intact for proper texture, but any remaining grime will create off-flavors during the 2-hour simmer and pickling process. Using baking soda and a stiff brush ensures a clean canvas for the tangy marinade.
Can I use apple cider vinegar instead of white vinegar?
Yes, but expect a slightly sweeter, cloudier final product. White vinegar provides clarity and a sharper tang, while apple cider adds subtle fruitiness. For balance, reduce sugar to 0.125 cup if using apple cider vinegar. The pickling time remains the same (12-24 hours), but flavor intensity may develop faster due to natural sugars.
How do I know when the chicken feet are properly tenderized?
Test doneness by piercing a joint with a fork—it should slide in easily with minimal resistance. The skin should also begin to crisp slightly at the edges after the 2-hour simmer. If they feel rubbery, extend cooking by 30 minutes in fresh water. Overcooking risks mushiness, so monitor closely.
Can I make this recipe without star anise?
Substitute with ½ tsp ground cinnamon or 1 cinnamon stick for warmth. For depth, add ½ tsp fennel seeds (toasted) or ¼ tsp cloves. The key is maintaining aromatic balance—adjust other spices (like ginger or garlic) to compensate. The pickling process will still work, though the flavor profile shifts slightly.
How long can I store the pickled chicken feet, and can I reuse the liquid?
Store in an airtight container in the fridge for up to 2 weeks, or freeze for 3 months. The pickling liquid can be reused once, stored separately for 1 week, but flavor fades with each use. For longer storage, transfer to glass jars and freeze the liquid solid—thaw only what you need.