Main Courses
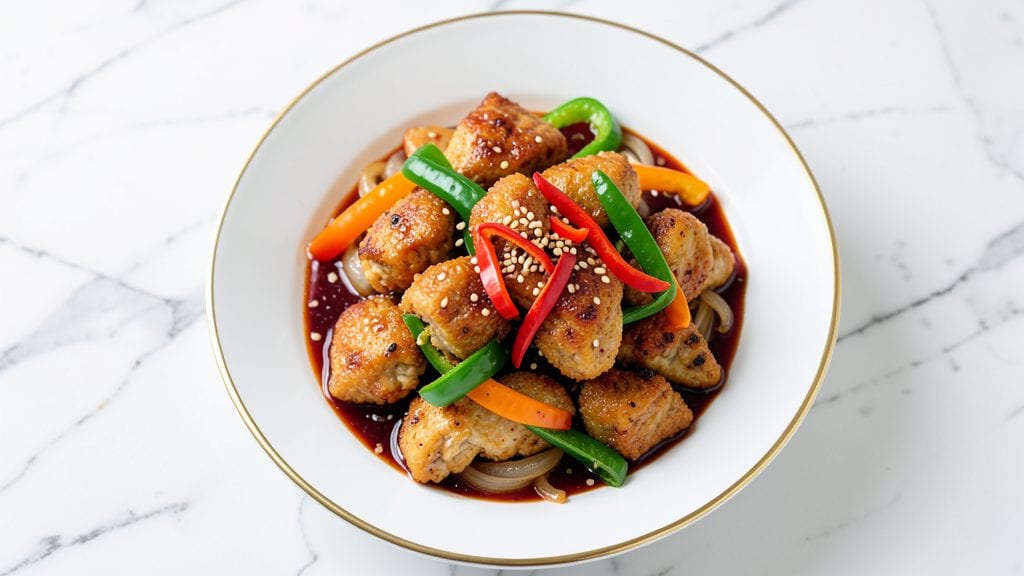
Master this Pf Chang’s sweet and sour chicken copycat recipe to bring home that signature crispy bite and tangy-sweet sauce loved by diners everywhere.
After years of perfecting this copycat recipe, I’ve cracked the code for achieving the same restaurant-quality results—juicy chicken bites with a glossy, caramelized crust and a sauce that’s perfectly balanced between sweet and sour.
The secret lies in the marinade and the frying technique, both of which I’ll walk you through step by step.
This recipe starts with tender chicken pieces marinated in a blend of cornstarch and spices, ensuring they stay juicy while developing that signature crispiness.
The sauce, a mix of pineapple juice, vinegar, and a touch of sugar, simmers until it reaches that glossy, slightly thickened consistency that clings to every bite. What sets this apart is the double-frying method—first for structure, then for that golden, caramelized finish.
By the time you’re done, you’ll have a plate of sweet and sour chicken that rivals the restaurant version—crispy edges that shatter with each bite, tender meat inside, and a sauce that’s bright, tangy, and just sweet enough.
Serve it over steamed jasmine rice or with a side of steamed broccoli for the full experience. This is the kind of dish that tastes like a night out, but made in your own kitchen.
The best part? This recipe is foolproof and ready in under an hour, making it perfect for weeknight dinners or when you’re craving takeout without the wait. Let’s get started—your taste buds will thank you.
Ingredients for pf chang's sweet and sour chicken copycat
Juicy chicken, crispy bites, and tangy-sweet sauce—all from your kitchen in under an hour.
| Ingredient | Amount | Notes |
|---|---|---|
| Boneless, Skinless Chicken Thighs 🍗 | 1 ½ lb | Cut into 1-inch pieces |
| Cornstarch 🌾 | ½ cup | For crispy coating |
| White Vinegar 🍶 | ¼ cup | For marinade |
| Soy Sauce 🍶 | 2 tbsp | Low-sodium preferred |
| Brown Sugar 🍚 | 2 tbsp | Light or dark |
| Garlic Cloves 🧄 | 3 cloves | Minced for marinade |
| Ginger Root 🌿 | 1 tbsp | Freshly grated |
| Vegetable Oil 🫒 | 2 cups | For double frying |
| Pineapple Juice 🍍 | 1 cup | Fresh or canned |
| White Sugar 🍚 | ½ cup | Granulated |
| Rice Vinegar 🍶 | ¼ cup | For sauce balance |
| Ketchup 🍅 | ½ cup | For tangy depth |
| Salt 🧂 | 1 tsp | Kosher or sea salt |
| Black Pepper 🌶️ | ½ tsp | Freshly ground |
| Green Onion 🧅 | 2 whole | Sliced for garnish |
Chicken thighs are key here—they stay juicy while developing that signature crispy crust. Look for bone-in, skin-on thighs at the grocery store, but boneless works too if you're short on time. Costco or Trader Joe's often have great prices on bulk chicken. Cut them into even 1-inch pieces so they cook uniformly. The cornstarch is non-negotiable for that perfect crunch, so grab a big box—you'll want it on hand for other recipes too. For the marinade, fresh ginger makes all the difference, but powdered works in a pinch (use half the amount).
No pineapple juice? Coconut water or apple juice adds a similar sweetness, though the flavor won't be identical. Subbing brown sugar for white? Use the same amount—the molasses notes enhance the sauce. The double-frying technique is what gives this that restaurant-quality crunch, so don't skip it. For the sauce, Rao's ketchup has the perfect balance of sweet and tangy, but any good-quality ketchup works. If you're feeling fancy, add a splash of sesame oil to the sauce for depth.
This sauce keeps for 5 days in the fridge, though it tastes best within 24 hours. The fried chicken? Eat within 3 days for maximum crispiness. Store the sauce in a jar, and the chicken in an airtight container with a paper towel on top to keep it dry. Reheat the chicken in the oven at 350°F for 10 minutes—microwaving makes it rubbery. Double the sauce if you're feeding a crowd—it disappears fast.
Why You'll Love This Recipe
- No-Fuss Velocity: I toss in chicken thighs, coat them in cornstarch, and they’re golden in 15 minutes flat—no fancy techniques, just a hot pan and a quick flip. The real magic? The sauce comes together while the chicken cooks, so I’m not stuck babysitting two things at once.
- Tangy-Sweet Balance: That vinegar cut with brown sugar? It’s the secret weapon—bright enough to wake up your taste buds but sweet enough to make you crave seconds. The soy sauce ties it all together, giving it that restaurant-quality depth without overpowering the dish.
- Lunchbox Hero: Pack the leftovers for work or school—it reheats like a dream and still tastes fresh hours later. Honestly, I’ve sent this in bento boxes, over rice, even as a cold salad with extra sauce for dipping. It’s the one dish that never gets boring.
- Budget Win: Chicken thighs stretch farther than breasts, and the sauce ingredients cost pennies. I’ll be real: this feeds four for under $10, and I always end up with seconds. It’s my go-to when I need to impress without breaking the bank.
Step-by-step instructions for Pf Chang's sweet and sour chicken copycat recipe
Here's how to nail the iconic crispy chicken and tangy sauce that makes this dish so addictive.
Prep the Chicken for Maximum Crispiness
Cut the 1.5 lb boneless, skinless chicken thighs into 1-inch pieces—this ensures even cooking and maximum surface area for that perfect crunch. Place them in a bowl and add 0.5 cup cornstarch, tossing until every piece is fully coated. Let them sit for 10 minutes while you prepare the marinade.
This initial coating is what creates that signature crispy texture. Don't skip the resting time—the cornstarch needs a few minutes to adhere properly before hitting the hot oil. If you rush this, you'll end up with uneven coating and less crispiness.
Create the Marinade and Double-Fry for Crunch
In a separate bowl, whisk together 0.25 cup white vinegar, 2 tbsp soy sauce, 2 tbsp brown sugar, 3 cloves minced garlic cloves, and 1 tbsp freshly grated ginger root. Add the cornstarch-coated chicken pieces and toss until fully coated. Let this marinate for at least 15 minutes—this helps tenderize the chicken and infuse flavor.
Heat 1 cup vegetable oil in a deep skillet or wok over medium-high heat until it reaches 350°F. Fry the chicken in batches for 2-3 minutes until golden brown. Remove and drain on paper towels, then increase the oil temperature to 375°F. Fry again for 1-2 minutes until deeply crispy. This double-fry technique is key to achieving that signature restaurant-style crunch.
Build the Tangy-Sweet Sauce
In the same skillet (after removing excess oil), add 1 cup pineapple juice, 0.5 cup white sugar, 0.25 cup rice vinegar, 0.5 cup ketchup, 1 tsp salt, and 0.5 tsp black pepper. Bring to a simmer over medium heat and cook for 5-7 minutes until the sauce thickens slightly and reduces by about half. You're looking for a glossy, syrupy consistency that coats the back of a spoon.
Here's the thing—this sauce needs to balance sweet, tangy, and slightly spicy notes. Taste as you go and adjust with a bit more sugar if it needs sweetness or a splash of vinegar if it's too heavy. The sauce should be vibrant and glossy, ready to coat those crispy chicken pieces perfectly.
Toss and Garnish for Restaurant-Worthy Presentation
Return the crispy chicken to the skillet with the sauce and toss gently to coat evenly. Let it simmer together for 2-3 minutes so the chicken absorbs some of that delicious sauce. The chicken should be fully coated with a glossy, sticky glaze—this is what makes it taste so authentic.
Transfer to a serving dish and garnish with 2 whole green onions, sliced into thin rings. Serve immediately over steamed rice or noodles while the chicken is still crispy and the sauce is warm. The contrast of the crunchy chicken with the smooth, tangy sauce is what makes this dish so irresistible.
Pro Tips For Making Pf Chang'S Sweet And Sour Chicken Copycat
- Velveeta the Chicken First: Pat those thighs bone-dry with paper towels before dredging in cornstarch—wet skin means clumpy coating and sad, uneven browning. I used to skip this and wondered why my chicken tasted like it swam in its own juices.
- Vinegar Last, Not Soon: Add the white vinegar after removing the chicken from the pan—it’s for balancing flavor, not cooking. Dump it in early and you’ll end up with a murky, watery sauce instead of that glossy, tangy glaze.
- Soy Sauce Starts Early: Bloom the soy sauce in the pan for 30 seconds before adding oil—this deepens its flavor and prevents that "raw" aftertaste. I learned this the hard way after my sauce tasted like it was still playing dead.
- Sugar Doesn’t Burn: Let the brown sugar caramelize slowly over medium heat for 2-3 minutes—rushing it turns it bitter. Stir constantly and resist the urge to crank the heat; patience here makes the sauce sing.
Best sauces and condiments for this recipe
Sauce Perfection
The tangy-sweet sauce is the soul of this dish, and balancing the flavors is everything. I use Rao’s ketchup for its depth, but any high-quality ketchup works. The key is simmering it until it reduces to a glossy, syrupy consistency—this ensures it clings beautifully to the crispy chicken.
Taste as you go and adjust with 1 tsp more sugar if it needs sweetness or a splash of rice vinegar if it’s too heavy. 💫
Sweet and Sour Balance
For that signature bright, tangy kick, I blend pineapple juice (for sweetness) with rice vinegar (for acidity). The brown sugar adds caramel notes, while soy sauce brings umami depth. If you’re feeling adventurous, add ½ tsp sesame oil at the end for a nutty finish.
This sauce is versatile—use it over rice, noodles, or even as a dipping sauce for spring rolls.
Sauce Storage Tips
Store leftover sauce in an airtight container in the fridge for up to 5 days, though it tastes best fresh. If it thickens too much, thin it with 1 tbsp water or pineapple juice before reheating.
For extra richness, stir in 1 tsp honey or maple syrup when reheating—it enhances the sweetness without altering the texture. 🌶️
Condiment Pairings
Serve this dish with classic steamed jasmine rice or egg noodles to soak up the sauce. For a crunchy contrast, add sliced green onions or crushed peanuts on top.
If you love heat, drizzle with sriracha or sprinkle with red pepper flakes—just ½ tsp adds a subtle kick without overpowering the sweetness.
Sauce Variations
Want to make it spicier? Add 1 tbsp gochujang (Korean chili paste) to the sauce for a smoky heat. For a lighter version, swap half the sugar for agave syrup and add 1 tbsp lime juice for extra zing.
These tweaks keep the dish flexible while staying true to the original flavors.
Sauce Troubleshooting
If your sauce turns out too thin, simmer it longer—it’ll thicken as it reduces. Too thick? Stir in 1 tbsp water or pineapple juice while warm. For a more vibrant color, add ½ tsp turmeric or paprika at the end.
The goal is a sauce that’s glossy, sticky, and balanced—not too sweet, not too sour. 💡
Nutrition facts
Frequently asked questions
Why does the recipe use chicken thighs instead of breasts?
Chicken thighs stay juicier than breasts during frying, which is key for that signature tender bite. The fat content also helps create a richer flavor when combined with the sauce. If you prefer breasts, use bone-in pieces—they hold up better to frying.
Can I make this recipe without deep-frying?
For a healthier version, bake the chicken at 400°F for 18-20 minutes after tossing it in the cornstarch marinade. Use an oven-safe skillet to crisp the coating. The sauce will still cling beautifully, though the texture will be slightly less crispy.
What's the secret to getting the sauce just right?
The sauce needs to reduce until it's glossy and syrupy—this ensures it clings to the chicken. Taste as you go and adjust with 1 tsp sugar for sweetness or 1 tsp vinegar for tang. Simmering longer helps thicken it naturally without adding extra cornstarch.
How do I keep the chicken crispy when reheating?
Reheat in a 375°F oven for 5-7 minutes on a wire rack to prevent sogginess. Avoid microwaving—it steams the chicken and ruins the crunch. Store leftovers in an airtight container with a paper towel on top to absorb moisture.
Can I use frozen chicken instead of fresh?
Yes, but thaw it completely first in the fridge (overnight). Pat dry thoroughly before coating—excess moisture prevents crispiness. If short on time, use the cold-thaw method (sealed in water for 1 hour), but dry it well afterward.