Soups & Stews
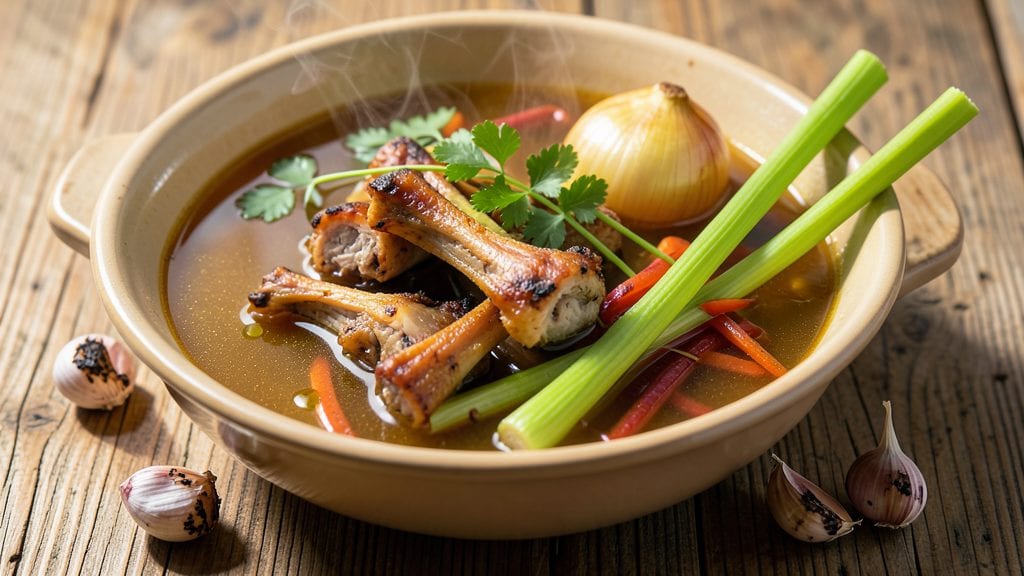
This old-fashioned chicken broth recipe delivers the deep, rich flavor that transforms soups, stews, and sauces into something extraordinary. The secret lies in slow simmering chicken bones with aromatic vegetables, creating a golden, velvety liquid packed with umami.
I first discovered this method while researching traditional healing broths—it’s the kind of recipe that’s been passed down for generations, yet still feels fresh and essential in modern kitchens.
The beauty of this broth is its simplicity: just chicken bones, vegetables, and herbs simmered for hours to develop complex layers of flavor. Unlike store-bought versions, homemade broth has a depth that comes from the slow extraction of collagen and natural juices.
The result is a golden, aromatic liquid that’s perfect for everything from hearty soups to delicate sauces, with no artificial additives.
What makes this recipe truly special is its versatility—use it as a base for soups, braises, or even risottos. The long simmering process ensures a smooth, rich texture that’s impossible to replicate quickly. Whether you’re cooking for comfort or tradition, this broth delivers restaurant-quality results in your own kitchen.
For those short on time, I’ll share a slow-cooker adaptation that maintains all the flavor without hours at the stove. Let’s get started on this timeless classic that’s as nourishing as it is delicious.
Ingredients for old fashioned chicken broth
Golden aromatics and slow-simmered bones make this broth the ultimate flavor foundation.
| Ingredient | Amount | Notes |
|---|---|---|
| Chicken Bones 🍗 | 4 lb | Raw or roasted for deeper flavor |
| Yellow Onion 🧅 | 1 whole | Cut into quarters, skin on |
| Carrots 🥕 | 4 whole | Scrubbed, cut into chunks |
| Celery Stalks 🥬 | 4 whole | Cut into 2-inch pieces |
| Garlic Cloves 🧄 | 6 cloves | Smashed, skin on for aroma |
| Fresh Parsley 🌿 | ¼ cup | Stems included for extra flavor |
| Fresh Thyme 🌿 | 2 sprigs | Or 1 tsp dried thyme |
| Fresh Bay Leaves 🍃 | 2 whole | Remove after simmering |
| Black Peppercorns 🌶️ | 1 tbsp | Crushed for intensity |
| Kosher Salt 🧂 | 2 tbsp | Diamond Crystal preferred |
| Cold Water 💧 | 12 cups | Enough to cover bones |
| Apple Cider Vinegar 🍎 | 2 tbsp | Brightens flavor |
| Extra-Virgin Olive Oil 🫒 | 2 tbsp | For initial searing |
The bones are everything here—chicken backs or necks have the best marrow and collagen. Local butchers often sell them cheaply, and Costco has great deals on whole chickens you can pick apart. Roast them first at 425°F for 20 minutes to deepen the flavor—don’t skip this step. Fresh herbs like parsley and thyme should be vibrant, not wilted. If using dried, Penzeys or bulk bins at natural markets have the best quality. The bay leaves? Grab the dried ones—they’re easier to find and just as effective.
No fresh herbs? Dried thyme at one-third the amount works, but fresh is ideal. Short on vinegar? Lemon juice or white wine vinegar are fine swaps. The olive oil is for searing—avocado oil works too if you prefer a higher smoke point. For extra depth, add a 1-inch piece of ginger or a splash of soy sauce if you're feeling adventurous. The broth will taste even richer if you use organic bones when possible—they often have better flavor.
This broth gets better with time—24 hours in the fridge lets the flavors meld perfectly. Strain and store in glass jars for up to 5 days or freeze for 6 months. I always make a double batch—one for immediate use, one to freeze. The slow-cooker version? Just add everything raw and cook on low for 8 hours. No skimping on simmer time—that’s where the magic happens.
Why You'll Love This Recipe
- No Chopping Chaos: I swear by this recipe because it’s the only broth I make—no fancy prep, just rough-chop the onion, carrots, and celery into big chunks (no peeling needed!). The bones? Toss them straight from the bag into the pot. Twenty minutes later, you’ve got flavor without the fuss.
- Deep Umami Magic: That crispy bone crust? Gold. The onions caramelize just enough to add sweetness, while the garlic cloves (smash ‘em first!) release their punch. Honestly, it’s the kind of broth that makes you pause mid-sip and think, "Wait, is this really just chicken bones?"
- Weeknight Workhorse: I keep a batch in the freezer for everything—soup bases, rice dishes, even a quick pasta sauce. It’s my go-to when I’m too tired to think but still need flavor. (Yes, even on a Tuesday night.) Plus, it’s the only broth that makes my picky-eater husband ask for seconds.
- Pennies to Pantry Gold: Between us, this is the most budget-friendly way to stretch a meal. Chicken bones cost next to nothing, and the veggies? Whatever’s on sale. A single pot feeds us for days, and the leftovers? Freeze them—no waste, all flavor. That’s what I call a win.
Step-by-step instructions for old-fashioned chicken broth
This is how you build a rich, flavorful broth that forms the backbone of countless meals.
Sear the Chicken Bones for Maximum Flavor
Preheat your largest stockpot over medium-high heat. Add the 2 tablespoons of extra-virgin olive oil and let it shimmer for about 30 seconds. Working in batches if needed, add the 4 pounds of chicken bones and sear them for 5-7 minutes per side until they develop a deep golden-brown crust. This caramelization is what creates that unmistakable depth of flavor in your broth.
I like to press down gently on the bones during the first minute of searing—this prevents them from curling and ensures even contact with the pan. If you hear sizzling and see steam, that's perfect. The bones should smell nutty and rich when done. Transfer the seared bones to a large bowl as you work, keeping them separate from any browned bits that fall into the pot.
Build the Vegetable Base and Sauté Aromatics
In the same pot (don't wipe it clean—the browned bits are pure flavor), add the 1 whole yellow onion cut into quarters, the 4 whole carrots cut into chunks, and the 4 whole celery stalks cut into 2-inch pieces. Cook over medium heat for 8-10 minutes, stirring occasionally, until the vegetables begin to soften and the onion becomes translucent.
Add the 6 cloves of garlic (skin on for extra aroma) and the 2 sprigs of fresh thyme. Cook for another 2-3 minutes until the garlic turns golden and fragrant. Here's the thing—don't let the garlic burn. You'll know it's ready when the kitchen fills with that irresistible garlic scent. Remove the garlic cloves and thyme sprigs and set them aside with the bones.
Deglaze and Combine All Ingredients
Pour in the 2 tablespoons of apple cider vinegar and scrape up all the browned bits from the bottom of the pot with a wooden spoon. This deglazing step captures all the concentrated flavors you've built. Add the 1 tablespoon of crushed black peppercorns and the 2 whole fresh bay leaves to the pot, then pour in the 12 cups of cold water. Stir well to combine.
Return all the seared bones, vegetables, and aromatics to the pot. Bring everything to a rolling boil over high heat, then immediately reduce the heat to maintain a gentle simmer. The liquid should bubble softly with occasional bursts—this is what creates a clear, flavorful broth rather than a murky one.
Simmer for Deep Flavor Development
Partially cover the pot (leave a small gap for steam to escape) and let the broth simmer gently for 3-4 hours. I know what you're thinking—this takes forever. But that's exactly what makes it worth it. The collagen in the bones breaks down slowly, creating that silky texture we all love. Check the water level occasionally and add hot water as needed to keep the bones covered.
After about 2 hours, you'll notice the broth starts looking clearer and more golden. This is when the magic really begins. The bones should be falling apart easily when you test them with tongs. When the broth has reduced by about 25% (you'll see it's more concentrated), it's ready for the final steps.
Strain and Finish with Fresh Herbs
Remove the pot from heat and let it sit for 10 minutes. This resting period allows any settled particles to sink to the bottom. Line a fine-mesh strainer with cheesecloth or a coffee filter if you want an especially clear broth, then strain the broth into a large bowl or clean pot. Discard the solids.
Return the strained broth to the pot and stir in the 0.25 cup of fresh parsley (including stems) and the 2 tablespoons of kosher salt. Taste and adjust the seasoning—you might need a bit more salt depending on your water's mineral content. The broth should be rich and savory with a bright, clean finish. Let it cool slightly before storing or serving over rice, with noodles, or as a base for soups.
Pro Tips For Making Old Fashioned Chicken Broth
- Char the Bones First: I learned this the hard way—skipping the char makes the broth taste flat. Toast the chicken bones in a dry pot over medium-high heat until they turn golden in spots. The Maillard reaction unlocks deeper flavor, and you’ll notice the difference right away.
- Chop Veggies Unevenly: No need for perfect dice—roughly chop carrots, celery, and onions into ½-inch chunks. Smaller pieces release flavor faster, but bigger chunks prevent the broth from turning into a vegetable puree. (Yes, even if you’re impatient like me.)
- Simmer, Don’t Boil: After adding everything to the pot, reduce heat to a gentle simmer—tiny bubbles, not rolling. Boiling scalds the collagen and makes the broth cloudy. I used to rush this, and the result was always murky. Low and slow is the only way.
- Strain Twice: Line a fine-mesh strainer with cheesecloth for the first pass, then strain again through a clean sieve. The first catch removes tiny bits, the second ensures a silky texture. (Your future self will thank you—trust me.)
Make-ahead tips for old fashioned chicken broth
Slow-Cooker Adaptation
For busy days, use your slow cooker to build the same deep flavor without constant monitoring. Add all ingredients as directed, but skip the initial searing step—just toss everything raw into the slow cooker.
Cook on low for 8 hours or high for 5 hours, then strain and finish with fresh herbs. The slow cooker’s gentle heat mimics the long simmer, extracting collagen perfectly. I always add an extra 1-inch piece of ginger for warmth in this method. 🌶️
Freezer-Friendly Batches
Double the recipe and freeze half for future use. Portion cooled broth into quart-sized glass jars, leaving 1-inch headspace to prevent expansion cracks. Label with the date—this broth keeps for up to 6 months without losing quality.
When ready to use, thaw overnight in the fridge or reheat directly from frozen on low heat, stirring occasionally to prevent scorching. The texture remains silky if you avoid high heat. ❄️
Fridge Storage Secrets
Let the broth cool to room temperature before refrigerating in airtight containers. The flavors actually deepen overnight as the fat rises to the top—skim this off before reheating for a cleaner taste.
Store for up to 5 days in the fridge, but I recommend using it within 3-4 days for peak freshness. For extra richness, add a splash of heavy cream or butter when reheating—it’s a chef’s trick I swear by. 💛
Time-Saving Shortcuts
No time to sear bones? Roast them first at 425°F for 20 minutes before adding to the broth. This shortcut still builds deep flavor without extra stove time. For vegetables, use pre-cut frozen mirepoix (onion, carrot, celery mix) to save chopping.
Just thaw and add directly to the pot. The broth will still be rich, though slightly less aromatic than fresh. 💡
Herb Variations
Swap thyme for rosemary or tarragon for a Mediterranean twist, or add a sprig of fresh sage for earthy depth. For Asian-inspired broth, include 1-inch ginger and 1 star anise pod.
Always adjust seasoning after simmering—herbs mellow during cooking. I keep dried herbs in small jars on my spice rack for quick access. 🌿
Broth Boosters
For extra umami, add 1-2 dried shiitake mushrooms or 1 tbsp soy sauce during simmering. A splash of white wine (like Sauvignon Blanc) brightens the flavor. For a smoky note, wrap 1-2 wood chips (like apple or hickory) in foil and simmer alongside the broth.
Remove before straining. These additions take your broth from good to restaurant-worthy. ✨
Nutrition facts
Frequently asked questions
Why does simmering time matter so much for this broth?
The 3-4 hour simmer is crucial because it breaks down collagen in the bones, creating that signature silky texture. Rushing this step results in a thinner, less flavorful broth. The long cook time also allows flavors to meld deeply—what makes homemade broth taste so much better than store-bought.
Can I use chicken thighs or breasts instead of bones?
While you can make broth with meat, bones are ideal for extracting collagen and minerals. If you must use meat, add 2 pounds of chicken thighs (skin-on for extra flavor) and simmer for 1.5 hours instead. The result will be less gelatinous but still delicious.
What's the best way to remove fat from cooled broth?
After refrigerating, the fat solidifies at the top. Use a spoon to carefully scoop it off before reheating. For a cleaner look, chill the broth in a shallow container—this creates more surface area for fat to congeal. Never use a fat separator on hot broth, as it can trap flavorful oils.
How do I fix broth that tastes too bland?
Add a splash of apple cider vinegar (1 tbsp) or a pinch of MSG (if you use it) to boost umami. For depth, simmer with an extra bay leaf or mushroom stem next time. Never over-salt—it's better to adjust gradually than overshoot.
Can I make this broth in an Instant Pot?
Yes! Follow the same steps but use high pressure for 60 minutes (natural release). For extra richness, add 1 cup of water at the end and pressure cook another 10 minutes. The Instant Pot speeds up collagen extraction while preserving flavor—perfect for busy weeknights.