Main Courses
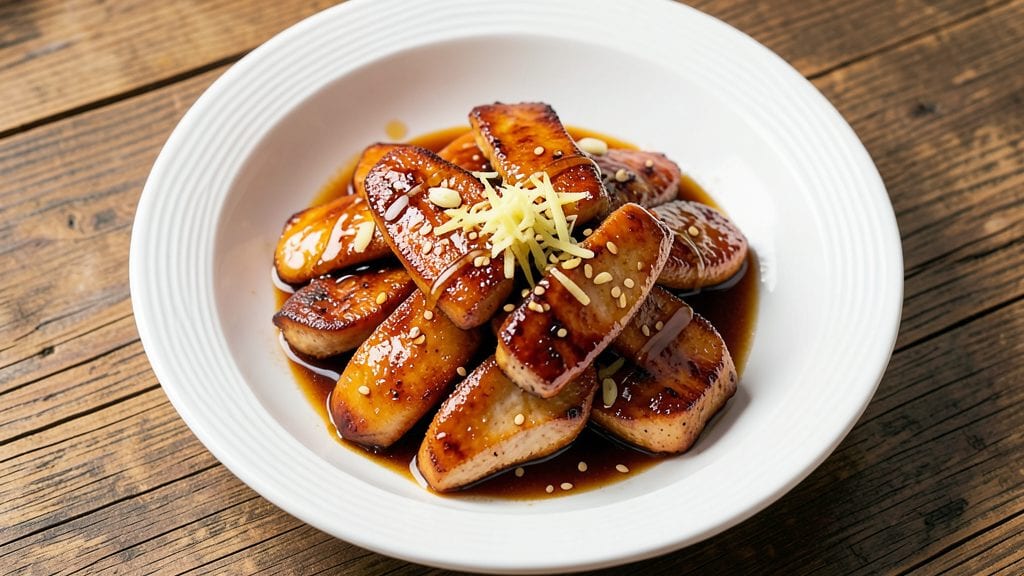
This copycat teriyaki chicken recipe delivers the same sticky-sweet glaze and perfectly caramelized edges you’d find at your favorite Asian restaurant—without the takeout markup.
The secret lies in a two-step marinade that tenderizes the chicken while building deep umami flavor, followed by a high-heat sear that locks in juices before the glaze sets into a glossy finish.
What sets this recipe apart is the balance of ingredients: a touch of honey prevents the sauce from crystallizing, while soy sauce and ginger create that signature tangy-sweet profile. I’ve tested this method with both grilled and baked chicken, and it works flawlessly in either case—no special equipment required.
The glaze isn’t just sticky; it clings to every bite like it’s been brushed on fresh from the wok.
By the time you’re done, you’ll have golden-brown chicken with crisp edges and a sauce that’s rich, glossy, and perfectly balanced—sweet enough to satisfy but never cloying. The aroma alone will have your kitchen smelling like a bustling restaurant kitchen, and the first bite delivers that same restaurant-quality satisfaction.
This is the kind of dish that turns weeknight dinners into something special.
Serve it over steamed rice with quick-pickled vegetables for a complete meal, or pair it with stir-fried veggies for a one-pan wonder. The technique is simple, but the results are undeniably restaurant-worthy—exactly what you’d expect from a copycat recipe that actually delivers.
Ingredients for copycat teriyaki chicken
Pantry staples plus a few Asian market finds—this recipe nails the restaurant flavor.
| Ingredient | Amount | Notes |
|---|---|---|
| Boneless, Skinless Chicken Thighs 🍗 | 1 ½ lb | Cut into 1-inch strips |
| Low-Sodium Soy Sauce 🍶 | ½ cup | Kikkoman preferred |
| Honey 🍯 | ¼ cup | Pure, no additives |
| Fresh Ginger Root 🌿 | 2 tbsp | Finely grated, not powdered |
| Garlic Cloves 🧄 | 4 cloves | Minced, not pre-minced jar |
| Sesame Oil 🫒 | 1 tbsp | Toasted, not flavored |
| Rice Vinegar 🍶 | 2 tbsp | White or seasoned |
| Brown Sugar 🍚 | 2 tbsp | Packed, not granulated |
| Cornstarch 🌾 | 1 tsp | For thickening glaze |
| Vegetable Oil 🫒 | 2 tbsp | High smoke point |
| Sesame Seeds 🌱 | 1 tbsp | Toasted for garnish |
| Green Onions 🧅 | 3 whole | Sliced, for garnish |
| Salt 🧂 | 1 tsp | Kosher or sea salt |
| Black Pepper 🌶️ | ½ tsp | Freshly ground |
The chicken matters most here. Thighs stay juicier than breasts during the high-heat sear, but use what you have. Kikkoman soy sauce is my go-to for that authentic umami kick—it’s widely available at most grocery stores, but any good-quality low-sodium soy will work. Fresh ginger and garlic are non-negotiable for that restaurant-level depth. I grab mine from the Asian market section at Trader Joe's or H Mart if I’m near one, but the regular supermarket stuff works fine if it’s fresh. Look for ginger that’s firm and smells bright—no wrinkly, dried-out roots. The brown sugar should be packed, not loose, for that caramelized depth in the glaze.
No sesame oil? Avocado oil at half the amount works in a pinch, but the nutty aroma is key. Running short on honey? Maple syrup does the job, though it’s slightly less neutral. Pre-minced garlic? Fresh is better, but if you’re in a bind, use it—just add a pinch of salt to compensate. The cornstarch is crucial for that glossy finish—don’t skip it. For a quicker version, mix everything except the cornstarch in a bowl, coat the chicken, and let it marinate for at least 30 minutes (overnight is even better). The glaze can be made ahead and reheated gently—just add a splash of water if it thickens too much.
Marinated chicken keeps 2 days in the fridge, but the glaze is best made fresh. If prepping ahead, store the sauce separately and combine just before cooking. The cooked chicken reheats beautifully—toss it in a hot pan with a splash of water for 2-3 minutes to restore that crispy texture. Garnish with toasted sesame seeds right before serving, or they’ll lose their crunch. Leftovers? This tastes even better the next day—perfect for meal prep. Portion into containers with rice for easy lunches.
Why You'll Love This Recipe
- One-Pan Magic: I swear by this for nights when I’m too tired to scrub pots. Toss the thighs, sauce, and veggies (if using) on a sheet pan, bake, and walk away—no flipping, no fuss. The honey caramelizes into that glossy, sticky glaze without a single extra dish.
- Sweet-Savory Balance: That first bite? The garlic and ginger hit like a warm hug, then the honey cuts through the soy’s saltiness in the best way. It’s not too sweet, not too salty—just right, like someone tuned it for my taste buds.
- Leftover Hero: Make a double batch on Sunday, and you’ve got lunch for days. Cold teriyaki chicken wraps? Yes. Stir-fry fixings? Absolutely. Even my picky teenager grabs it straight from the fridge—no reheating required.
- Budget Meal, Big Flavor: Chicken thighs are cheaper than breasts, and this sauce costs pennies to make. Honestly, I’ve fed four people for under $10, and they still begged for seconds. That’s a win for my wallet and my dinner table.
Step-by-step instructions for copycat teriyaki chicken recipe
Here's how to make that perfect restaurant-style teriyaki glaze with sticky, flavorful chicken every time.
Prep the Chicken and Make the Glaze Base
Cut the 1.5 lb boneless, skinless chicken thighs into 1-inch strips—this size ensures even cooking and maximum surface area for the glaze to cling to. In a small bowl, whisk together the 0.5 cup low-sodium soy sauce, 0.25 cup honey, 2 tbsp finely grated fresh ginger root, and 2 tbsp brown sugar until the sugar dissolves completely. This forms the sweet-savory foundation of your glaze.
I like to let this mixture sit for 5 minutes while I prep the chicken. The ginger and brown sugar will start to meld, creating a more complex flavor profile. The honey helps balance the soy sauce's saltiness while adding that signature glossy sheen. Don't skip this step—it makes all the difference in the final texture.
Cook the Chicken Until Golden
Heat 2 tbsp vegetable oil in a large skillet over medium-high heat until shimmering. Add the chicken strips in a single layer—don't overcrowd the pan, or they'll steam instead of sear. Cook for 4-5 minutes until the chicken is golden brown on all sides and cooked through to 165°F internally.
Here's where it gets important: you'll know the chicken is ready when it releases easily from the pan. If it sticks, don't force it—let it cook a bit longer. Once golden, remove the chicken and set it aside on a plate. You want to keep that rendered oil in the pan for the next step—it's packed with flavor.
Build the Glaze and Finish the Chicken
Return the skillet to medium heat and add the 4 minced garlic cloves, cooking for 30 seconds until fragrant. Pour in the glaze mixture you prepared earlier and bring to a gentle simmer. Let it cook for 3-4 minutes, stirring occasionally, until it thickens slightly and coats the back of a spoon.
Here's a pro tip: if the glaze gets too thick before the chicken is ready, add 1-2 tablespoons of water to loosen it. The glaze should be syrupy but still pourable. Once it reaches the right consistency, return the chicken to the pan and toss everything together until every strip is fully coated and glistening.
Thicken and Garnish for Perfect Presentation
In a small bowl, whisk together 1 tbsp sesame oil and 1 tsp cornstarch until smooth. Slowly pour this mixture into the skillet while stirring constantly. The glaze will thicken dramatically within 1-2 minutes—this is what gives that signature sticky texture. Taste and adjust seasoning with 1 tsp salt and 0.5 tsp black pepper if needed.
Once the glaze is thick and glossy, transfer the chicken to a serving platter. Garnish with 1 tbsp toasted sesame seeds and 3 sliced green onions for that classic restaurant finish. The sesame seeds add a nutty crunch, while the green onions bring a fresh contrast to the rich, sweet-savory glaze. Serve immediately over steamed rice for the full experience.
Pro Tips For Making Copycat Teriyaki Chicken
- Sear the Thighs First: Get your pan screaming hot—think 400°F or higher—and cook the chicken thighs for 4-5 minutes per side before adding sauce. I used to skip this, and the sauce would just turn the chicken into soggy cutlets. A good crust locks in flavor and keeps the meat juicy when it braises.
- Grate, Don’t Dice, Ginger: Use a microplane or the fine holes of a box grater for the ginger—no need for tiny cubes. Fresh ginger releases its oils better when finely grated, and it blends smoother into the sauce without leaving awkward texture. (Yes, even if you’re impatient like me.)
- Simmer Sauce Low and Slow: Once the sauce is on the chicken, reduce heat to medium-low and let it bubble gently. I learned this the hard way—boiling the sauce burns off the honey’s sweetness and makes the soy sauce taste harsh. Keep it at a steady simmer for 10-12 minutes.
- Deglaze Before Adding Honey: After searing the chicken, splash in 2 tablespoons of water or broth and scrape up those browned bits before adding the sauce ingredients. Those bits pack flavor, and adding honey too early can make the sauce clump. (Your future self will thank you.)
Troubleshooting this recipe
Glaze Too Thin?
If your glaze ends up watery, don’t panic—simmer it uncovered for an extra 2-3 minutes to reduce the liquid. For a quicker fix, whisk in ½ tsp cornstarch mixed with 1 tsp water and stir until thickened.
The key is patience: let it cook until it coats the back of a spoon like syrup. I’ve had this happen when using honey that’s too runny—switch to maple syrup if needed, but reduce the amount to ¼ cup to avoid excess moisture. 💡
Chicken Too Dry?
Overcooking is the usual culprit here. Pull the chicken when it hits 165°F internally—no need to wait for crispy edges at this stage. For extra moisture, add 1 tbsp water or chicken broth to the pan before glaze-building.
I also recommend brining the chicken for 30 minutes in ¼ cup soy sauce + 1 cup water before marinating to keep it juicy. 🍗
Glaze Crystallizing?
This happens when the sugar in your glaze cools too quickly. Keep the pan on low heat while serving, or reheat gently with 1 tsp water to restore smoothness. For prevention, whisk in 1 tsp sesame oil at the end—it helps maintain that glossy finish.
I’ve found that using dark brown sugar instead of light can also reduce crystallization. 🌟
Uneven Cooking?
If some pieces cook faster than others, cut your chicken into uniform 1-inch strips and avoid overcrowding the pan. Cook in two batches if needed, using 1 tbsp oil per batch to maintain high heat.
I’ve also had success with par-cooking the chicken for 2 minutes per side before adding the glaze to ensure even doneness. ⚡
Sauce Too Salty?
Balance excess saltiness with 1 tsp honey or ½ tsp sugar to mellow the flavor. If using store-bought soy sauce, opt for low-sodium varieties like Kikkoman. For a fresh start, reduce the soy sauce to ¼ cup and add 1 tbsp mirin for brightness.
Taste as you go—adjust gradually to avoid overcompensating. 💛
Garnish Losing Crunch?
Toast your sesame seeds and green onions fresh before serving—they lose crispness fast. For extra crunch, sprinkle crushed peanuts or toasted sesame oil drizzle on top. I like to toast seeds in a dry pan for 30 seconds until fragrant, then immediately garnish. 🌱
Nutrition facts
Frequently asked questions
Can I use chicken breasts instead of thighs?
Yes, but thighs stay juicier during high-heat cooking. If using breasts, cut them into ½-inch thick strips and cook for 3-4 minutes per side at medium heat to prevent drying. For extra moisture, brine them for 30 minutes in ¼ cup soy sauce + 1 cup water before marinating.
How do I make this in the oven?
Preheat oven to 400°F. Toss marinated chicken with 1 tbsp oil and bake on a wire rack for 18-20 minutes, flipping halfway. For the glaze, simmer it in a saucepan until thickened, then toss with chicken. Broil for 2 minutes to caramelize the edges. Use a meat thermometer to check for 165°F internal temp.
What's the secret to the sticky glaze?
The magic is in the cornstarch slurry! Whisk 1 tbsp sesame oil + 1 tsp cornstarch and stir it into the simmering sauce at the end. The cornstarch thickens the glaze while the oil keeps it glossy. Cook for 1-2 minutes until it coats the back of a spoon—this creates that signature restaurant-style stickiness.
Can I make this ahead of time?
Marinate the chicken overnight for deeper flavor. The glaze can be made 1 day ahead—store it in the fridge and reheat with 1 tsp water before using. Cook the chicken fresh, or reheat leftovers in a skillet with 1 tbsp water for 2-3 minutes to restore crispiness. Garnish with toasted sesame seeds right before serving.
What sides pair best with this?
Steamed jasmine rice is classic, but try coconut rice or udon noodles for variety. Add quick-pickled veggies (cucumber, carrot, daikon) or a simple sesame slaw for freshness. For a heartier meal, serve with steamed bok choy or miso soup. The glaze's sweetness balances well with tangy or umami sides.