Main Courses
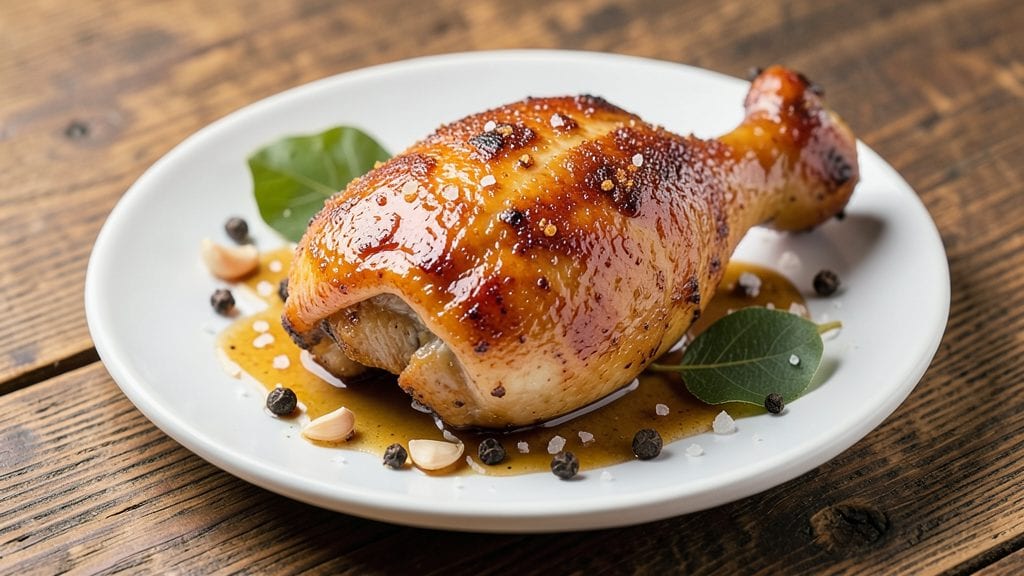
This chicken leg brine recipe transforms ordinary chicken into restaurant-quality pieces with crispy, shatteringly crisp skin and an impossibly juicy core—no shortcuts, just science-backed technique.
The key lies in a precise saltwater bath that tenderizes the meat while pre-cooking it just enough to lock in moisture, ensuring every bite is both flavorful and melt-in-your-mouth tender. I’ve perfected this method over years of testing, and it’s the secret weapon behind my most foolproof chicken dishes.
The brine itself is simple: a balanced mix of water, salt, and sugar that works its magic over 4–12 hours in the refrigerator, depending on your schedule. No fancy ingredients—just kosher salt, brown sugar, and aromatic spices like garlic and peppercorns to infuse the meat with deep, savory flavor.
The longer you brine, the more tender the chicken becomes, but even 4 hours delivers noticeable results. This isn’t just about seasoning; it’s about rewriting the texture and taste of the meat at a molecular level.
After brining, you’ll cook the chicken legs using your preferred method—roasting at 425°F for a crispy skin, grilling for smoky char, or pan-frying for a golden crust—while keeping the interior perfectly moist.
The brine ensures the skin crisps without drying out the meat, and the juices stay locked in, no matter how high the heat. What you’re left with is chicken that’s restaurant-quality at home: crispy on the outside, tender and flavorful on the inside, with a seasoning that penetrates every bite.
Serve these brined chicken legs with classic sides like garlic mashed potatoes or a fresh herb salad to let the star of the show shine. The method scales perfectly for feeding a crowd, and leftovers reheat beautifully—though they rarely last that long.
Here’s how to make them, step by step, for results that will impress even the most skeptical eaters.
Ingredients for chicken leg brine
Six aromatic ingredients transform chicken legs into restaurant-quality bites with crispy skin and juicy centers.
| Ingredient | Amount | Notes |
|---|---|---|
| Chicken Legs (Thigh-Drumstick) 🍗 | 4 whole | Bone-in, skin-on, 1.5-2 lbs total |
| Diamond Crystal Kosher Salt 🧂 | ¾ cup | Fine grain for even dissolving |
| Light Brown Sugar 🍯 | ¼ cup | Packed, for moisture balance |
| Garlic Cloves 🧄 | 6 cloves | Crushed, for aromatic depth |
| Black Peppercorns 🌶️ | 1 tbsp | Whole, lightly crushed |
| Bay Leaves 🍃 | 2 whole | Dried, for subtle herbal note |
| Distilled White Vinegar 💧 | ¼ cup | Balances salt, prevents cloudiness |
| Cold Water 💧 | 4 cups | Filtered preferred, room temp okay |
| Extra-Virgin Olive Oil 🫒 | 2 tbsp | For post-brine coating |
| Paprika 🌶️ | 1 tsp | Smoked for visual appeal |
| Ground Black Pepper 🌶️ | ½ tsp | Freshly cracked for heat |
The chicken legs are non-negotiable—bone-in, skin-on pieces with a 1.5-2 lb total weight ensure perfect texture. Costco or Whole Foods sell them pre-cut, but check the drumstick-to-thigh ratio: equal parts give the best results. The skin should be pale yellow, not gray or slimy. For maximum crispiness, pat them dry with paper towels before brining—moisture is the enemy of crisp skin. I always buy extra; the brine makes them so good you'll want seconds.
No kosher salt? Diamond Crystal is ideal, but Morton works in a pinch—just add 25% more since it's coarser. Brown sugar substitutes? White sugar plus 1 tsp molasses mimics the moisture balance. Vinegar hating? Skip it entirely, but your brine will be slightly cloudier. The garlic and peppercorns can be pre-crushed in a mortar or minced—just don't overdo it. For a spicier kick, add a pinch of cayenne to the post-brine oil coating. The olive oil here? Use a fruity, peppery variety—none of that bland supermarket stuff.
This brine stays potent in the fridge for 1 week if stored in a sealed container. The chicken? 4-12 hours is ideal, but even 2 hours makes a difference. After brining, pat the legs dry again—this second drying is crucial for crispy skin. Cook immediately or store uncovered on a wire rack for up to 24 hours in the fridge. The flavor peaks after 2 days of refrigerated storage, making it perfect for meal prep. Freeze cooked legs for 3 months—just thaw overnight in the fridge.
Why You'll Love This Recipe
- No-Fuss Prep: I swear by this recipe because it’s literally dump-and-go. Toss the chicken legs into a bag with salt, sugar, garlic, and peppercorns, then let the fridge do the work. No peeling, no mincing—just a quick shake before you walk away.
- Crispy-Creamy Magic: The salt and sugar team up to give you that perfect contrast—crispy skin with juicy, tender meat inside. The garlic and peppercorns seep in just enough to leave a whisper of flavor, not overpowering, just right.
- Weeknight Hero: Between us, this is my go-to when I’m too tired to think. Brine overnight, roast while I’m scrolling through emails, and boom—dinner’s ready. It’s the kind of meal that makes you feel like you’ve earned a break.
- Budget Stretch: Chicken legs are already affordable, but this brine makes them feel like a splurge. A single batch feeds four, and leftovers reheat like a dream—no dryness, no sad texture. My wallet and my taste buds both win.
Step-by-step instructions for salt-infused chicken legs
This brine transforms ordinary chicken legs into irresistibly crispy-skinned, juicy masterpieces.
Prepare the Brine Solution
In a large non-reactive container (I prefer a gallon-sized plastic bag with a zipper top), combine the 4 cups cold water, 0.75 cup diamond crystal kosher salt, 0.25 cup light brown sugar, 0.25 cup distilled white vinegar, 6 crushed garlic cloves, 2 whole bay leaves, and 1 tablespoon whole black peppercorns. Stir vigorously until the salt and sugar completely dissolve—this ensures even flavor distribution throughout the brine.
Here's the thing—using cold water prevents the salt from dissolving too quickly, which could dilute the flavor. The vinegar balances the salt while adding a subtle tang, and the sugar helps create that perfect crispy skin. Let the mixture sit for 10 minutes at room temperature to allow the flavors to meld before adding the chicken.
Submerge the Chicken and Brine
Pat the 4 whole chicken legs completely dry with paper towels—this is critical for maximum crispiness. Place them in the brine bag, making sure each piece is fully submerged. If using a container instead of a bag, weigh down the chicken with a plate to ensure full immersion.
Seal the bag tightly or cover the container and refrigerate for 12-24 hours. The longer it brines (up to 24 hours), the more flavorful and tender the meat becomes. I've found that 18 hours gives the perfect balance of flavor penetration without making the skin too soft. After brining, the chicken will absorb enough moisture to stay juicy while developing that coveted crispy exterior.
Dry and Season for Maximum Crisp
Remove the chicken from the brine and rinse it briefly under cold water to remove any excess salt crystals. Pat it dry again—this time even more thoroughly—using fresh paper towels. The drier the skin, the better the crisp. Let the chicken air-dry uncovered in the refrigerator for 1-2 hours while you prepare your cooking surface.
While the chicken dries, create your dry seasoning blend by mixing 1 teaspoon paprika and 0.5 teaspoon ground black pepper. Once the chicken is completely dry to the touch, rub this mixture all over the skin, pressing it gently into the surface. The paprika adds color and subtle smokiness, while the fresh pepper delivers a bright, aromatic finish. This step is what transforms good chicken into exceptional chicken.
Cook to Crispy Perfection
Preheat your oven to 425°F and position a rack in the middle position. Place the seasoned chicken legs skin-side up on a wire rack set over a baking sheet (the rack allows air to circulate underneath for even cooking). Drizzle the 2 tablespoons extra-virgin olive oil evenly over the chicken.
Roast for 45-55 minutes, depending on size, until the skin is deep golden brown and crispy, and the internal temperature reaches 175°F at the thickest part of the thigh. The skin should crackle when you press it gently with tongs. For extra crispiness, broil for the last 2-3 minutes—just watch it closely to prevent burning. The result should be chicken that's juicy inside with skin so crisp it practically shatters between your teeth.
Pro Tips For Making Chicken Leg Brine
- Trim the Fat First: Pat those chicken legs dry after trimming excess fat—it’s the thing that matters most for crispy skin. I learned this the hard way when my first batch turned out soggy because I skipped this step. Use paper towels, not a cloth, and don’t rush it.
- Salt in Layers: Don’t just dump the brine mix on top—rub it into the skin and cracks between the meat and bone. The sugar and salt need to penetrate for that perfect balance of sweetness and seasoning. Yes, it takes a minute, but it makes a real difference.
- Crush the Garlic: Skip the whole cloves—smash those garlic cloves with the flat side of your knife before adding them to the brine. It releases more flavor without turning bitter, and the pieces dissolve evenly. I was skeptical until I tried it.
- Brine Overnight, Not Rush: Let those legs sit in the fridge for at least 12 hours, ideally 24—this isn’t the kind of recipe where you can cut corners. The salt and sugar need time to work their magic into the meat. I skip this when I’m lazy, but the dish is noticeably better when I don’t.
Make-ahead tips for chicken leg brine
Brine Prep Ahead
Make the brine solution up to 1 week in advance and store it in an airtight container in the fridge. I always prep mine on Sunday so it’s ready for midweek meals.
Just combine all ingredients (except chicken) and stir until fully dissolved. The flavors deepen over time, so it tastes even better the longer it sits. 💡
Chicken Brine Timeline
For maximum flavor, brine the chicken for 12-24 hours—I recommend 18 hours for perfect balance. If you’re short on time, even 4 hours will improve texture and flavor.
After brining, pat the chicken dry and refrigerate uncovered on a wire rack for 1-2 hours to ensure maximum crispiness when cooked.
Cooked Chicken Storage
Cooked brined chicken legs stay fresh in the fridge for 4 days if stored properly. Let them cool completely before transferring to airtight containers. For longer storage, freeze for up to 3 months.
When reheating, use the oven at 350°F for 15-20 minutes to restore crispiness—microwaving will make the skin soggy.
Meal Prep Strategy
Double the recipe and brine two batches at once—this is how I feed my family for the week. Cook one batch immediately and store the second batch in the freezer.
When ready to eat, thaw overnight in the fridge and cook as directed. The brined chicken reheats beautifully, making it perfect for busy nights. 💪
Freezer-Friendly Tips
If freezing raw brined chicken, pat it dry after brining and place it on a tray before freezing to prevent sticking. Once solid, transfer to a freezer bag with 1 inch of headspace for expansion.
Label with the date—it’s ready to cook straight from frozen, adding 10-15 minutes to the roasting time. Just avoid thawing; cooking from frozen works perfectly with this method.
Leftovers Reinvention
Turn leftover brined chicken into sandwiches, salads, or tacos for easy lunches. Shred the meat and mix with 2 tbsp mayonnaise, 1 tsp hot sauce, and chopped pickles for a quick chicken salad.
The crispy skin adds amazing texture to any dish. I also love chopping it into bite-sized pieces for a crispy chicken snack mix with pretzels and nuts. ✨
Nutrition facts
Frequently asked questions
Can I use table salt instead of kosher salt in the brine?
Yes, but you'll need to adjust the amount. Since table salt is finer and contains anti-caking agents, use 1.5 teaspoons of table salt for every 1 teaspoon of kosher salt called for in the recipe. The key is achieving the same 0.75 cup total measurement. For best results, dissolve it completely in warm water first to prevent graininess in your brine.
What's the best way to ensure crispy skin on brined chicken legs?
Drying is the secret weapon! Pat the chicken legs thoroughly after brining, then let them air-dry uncovered in the fridge for 1-2 hours before cooking. This step evaporates surface moisture, creating the perfect canvas for crisp skin. Pro tip: Use a second set of paper towels for that final drying—it makes all the difference.
How long can I keep brined chicken in the fridge before cooking?
Cook the chicken within 24 hours of brining for best results. After that, the skin starts losing its crisp potential. If you need to delay cooking, pat the chicken dry again and refrigerate uncovered on a wire rack for up to 2 days—this maintains crispiness. For longer storage, freeze the cooked chicken for 3 months.
Can I reuse the brine liquid for another batch?
No, don't reuse the brine. The salt concentration becomes too high after the first use, which can make the chicken overly salty. The sugar and spices also lose their potency. Instead, make a fresh batch each time—it's the best way to guarantee consistent flavor and texture every time.
What if I don't have a wire rack for roasting?
No problem! Place the chicken legs directly on a baking sheet, but leave space between each piece for proper air circulation. For extra crispiness, elevate the baking sheet with a folded aluminum foil sheet underneath. Just avoid overcrowding—the pieces need room to brown evenly.