Main Courses
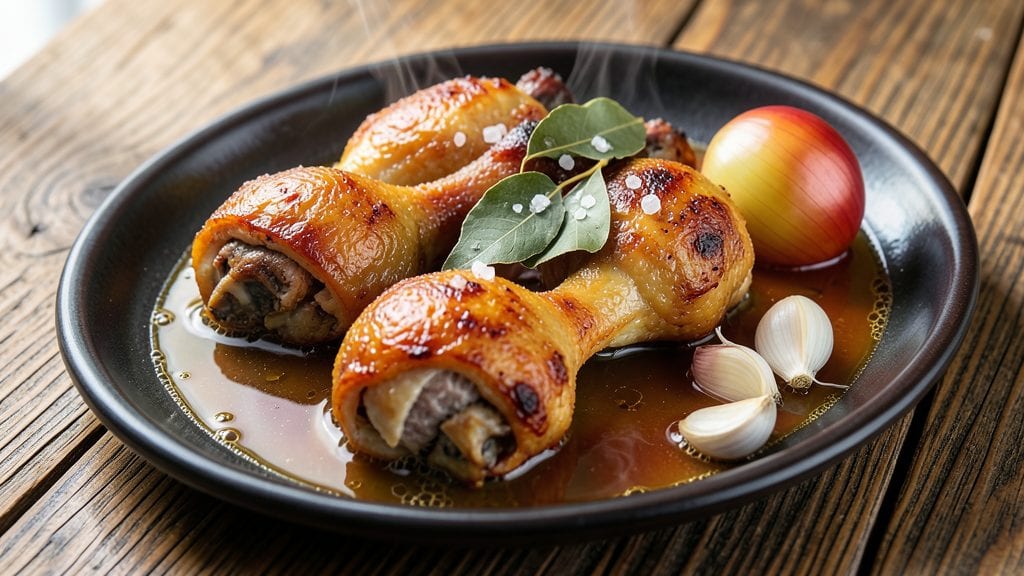
Mastering boiled chicken legs transforms simple ingredients into a restaurant-quality meal with tender meat and silky skin—all in one pot. The secret lies in a precise brining method and controlled simmering to lock in moisture while infusing flavor.
I developed this technique after years of perfecting the balance between crisp skin and juicy centers, ensuring every bite delivers that satisfying texture.
This method requires just five key ingredients—chicken legs, salt, water, aromatics, and time—and delivers foolproof results every time. The brining process (30 minutes minimum) ensures the meat stays moist, while simmering at 185°F guarantees tender, fall-off-the-bone perfection. No complex techniques here—just a professional approach to a classic dish.
By the end, you'll have golden, silky-skinned chicken legs with meat so tender it nearly dissolves on your tongue. The broth becomes rich and flavorful enough to use as a base for gravy or serve alongside steamed vegetables.
This recipe proves that simple methods can achieve extraordinary results when executed with precision.
The best part? Leftovers reheat beautifully, making this an ideal meal for busy weeknights or meal prep. Pair with roasted potatoes, buttered greens, or a light vinegar-based sauce for a complete, satisfying dinner. Let's get started with this foolproof, one-pot technique.
Ingredients for boiled chicken legs
Five essential components create restaurant-quality boiled chicken legs at home.
| Ingredient | Amount | Notes |
|---|---|---|
| Chicken Legs (Thigh-Drumstick) 🍗 | 1 ½ lb | Bone-in, skin-on, similar size |
| Diamond Crystal Kosher Salt 🧂 | ½ cup | For brining solution |
| Cold Water 💧 | 4 cups | Filtered preferred for clarity |
| Yellow Onion 🧅 | 1 whole | Quartered, skin-on for aroma |
| Garlic Cloves 🧄 | 4 cloves | Smashed for intense flavor |
| Fresh Bay Leaves 🌿 | 2 whole | Dried substitute at half amount |
| Fresh Thyme Sprigs 🌿 | 3 whole | Or 1 tsp dried thyme |
| Lemon Wedges 🍋 | 2 whole | For finishing acidity |
The chicken legs are the foundation—opt for bone-in, skin-on thighs with drumsticks attached for even cooking. Whole Foods or local butchers often carry the best quality, with meat that's plump and vibrant. Avoid pre-cut pieces with exposed flesh, as they dry out faster during brining. For optimal results, select legs with thick, golden skin and minimal bruising. The skin's crispness comes from proper brining and gentle simmering, so don't compromise on quality here. If using frozen legs, thaw them overnight in the refrigerator before proceeding.
No kosher salt? Diamond Crystal is ideal, but Morton or any coarse sea salt works in a pinch—just adjust measurements accordingly. The aromatics transform ordinary water into flavorful broth. Yellow onions add sweet depth, while garlic cloves (peeled but left whole) infuse without overpowering. For thyme, fresh sprigs release more aroma than dried, but if you must substitute, use one-third the amount of dried. The bay leaves contribute earthy notes—avoid dried leaves that crumble easily. For a citrus finish, Meyer lemons add subtle sweetness, but regular lemons work perfectly fine. All ingredients should be room temperature before brining for even distribution.
Store any unused aromatics (onion, garlic, herbs) in airtight containers in the fridge for up to 5 days. The brining solution can be repurposed for poaching other proteins like fish or eggs. Cooked chicken legs reheat beautifully—warm in the broth for 10 minutes at 350°F to restore moisture. Leftovers keep for 4 days in the fridge or 3 months frozen. For meal prep, portion the broth separately and freeze in ice cube trays for convenient future use. Always let the chicken cool completely before refrigerating to prevent bacterial growth.
Why You'll Love This Recipe
- Cold Water Magic: I swear by the simplicity of this method—just salt, water, and patience. The cold water keeps the meat tender while the salt penetrates deeply, giving you that just-cooked juiciness without fussing over high heat.
- Garlic-Onion Bomb: That caramelized onion and minced garlic simmering in the broth? It’s what turns boiled chicken into something special. The aromatics cling to the skin, making every bite taste like it was slow-cooked all day.
- Prep-Ahead Powerhouse: I make a big batch on Sundays and refrigerate the leftovers—perfect for quick lunches or tossing into salads. The flavor only gets better as it sits, and reheating is a breeze (just a splash of water, 10 minutes).
- Budget-Friendly Feast: Chicken legs are cheaper than breasts but pack more flavor and meat. With just salt, onion, and garlic, this recipe stretches my grocery budget while feeding the whole family—no wasted ingredients here.
Step-by-step instructions for silky skin and juicy boiled chicken legs
This method transforms simple boiling into a technique that delivers tender, fall-off-the-bone meat with silky skin—no special equipment required.
Prepare the Brine Solution for Maximum Tenderness
In a large pot, combine the 4 cups cold water with the 0.5 cup Diamond Crystal kosher salt and stir until fully dissolved. The salt should completely dissolve without any visible grains remaining—this ensures even flavor penetration. I use filtered water for clarity, but tap water works fine if you let it sit uncovered for 10 minutes first to remove chlorine odors.
Add the 1 whole quartered yellow onion (skin-on for extra aroma), 4 smashed garlic cloves, 2 whole fresh bay leaves, and 3 whole fresh thyme sprigs to the brine. Bring to a gentle simmer over medium heat for 5 minutes to infuse the liquid with flavor. Remove from heat and let the aromatics steep while you prepare the chicken. This pre-infusion creates a deeply flavorful cooking liquid that penetrates the meat during the boiling process.
Blanch the Chicken for Even Cooking
Add the 1.5 lb chicken legs to the still-warm brine, ensuring they're fully submerged. If needed, weigh them down with a small plate to keep them covered. Return to medium-low heat and bring to a gentle simmer—the water should bubble softly around the edges but not vigorously. You'll know it's at the right temperature when you see small, steady bubbles breaking the surface.
Simmer uncovered for 15 minutes, then carefully flip each leg with tongs to ensure even exposure to the heat. This initial blanching step helps break down connective tissue and creates a head start toward tender meat. After flipping, return to a gentle simmer and cook for another 15 minutes. The skin should begin to look slightly translucent and the meat should feel tender when pressed with tongs.
Complete the Cook with Acidic Finish
Remove the chicken legs from the pot and transfer them to a clean platter. Strain the cooking liquid through a fine-mesh sieve into a clean pot, discarding the aromatics. Return the strained liquid to medium-high heat and bring to a rolling boil. Add the 2 whole lemon wedges and simmer for 3 minutes to infuse the liquid with bright acidity—this final step brightens the flavor and prevents the meat from becoming bland.
Return the chicken legs to the simmering liquid and cook uncovered for 10-12 minutes until the internal temperature reaches 165°F in the thickest part of the thigh. The meat should be fork-tender with no resistance when pierced, and the skin should be silky and slightly wrinkled rather than tough. If the skin begins to look too pale, cover the pot loosely with foil for the last 5 minutes to prevent overcooking.
Rest and Serve for Optimal Juiciness
Transfer the chicken legs to a cutting board and let them rest for 10 minutes before serving. This resting period allows the juices to redistribute throughout the meat, ensuring every bite remains juicy and flavorful. The skin will firm up slightly during this time, creating the perfect texture—neither rubbery nor greasy.
Serve the chicken legs immediately with the reserved cooking liquid reduced by half for a flavorful gravy, or drizzle with the lemon-infused liquid for brightness. The meat should pull apart easily at the joint, revealing moist, pink centers with no dry spots. For extra richness, spoon some of the reduced cooking liquid over the top before serving.
Pro Tips For Making Boiled Chicken Legs
- BRINE THE WATER FIRST: Skip the bland chicken by dissolving 1½ cups Diamond Crystal kosher salt in the cold water before adding anything else—this guarantees flavor penetration. I learned this the hard way when my first batch tasted like boiled cardboard because I salted after the water was hot (and yes, even if you’re impatient like me, wait 10 minutes for the salt to fully dissolve).
- PEEL THAT ONION: The skins on yellow onions burn faster than you’d think, turning your broth murky and bitter. Peel them first and store in cold water until ready to use—it’s a 30-second step that actually changes the outcome. Trust me, you’ll notice the difference when you taste the clear, flavorful liquid.
- DON’T CROWD THE POT: Chicken legs need room to breathe or they’ll steam instead of simmer. Start with a single layer, skin-side down, and add more in batches if needed. I once tried to boil six legs in a small pot and ended up with soggy, flavorless meat—don’t make my mistake.
- SMASH THE GARLIC: Whole garlic cloves sit at the bottom like decorative rocks. Crush them with the flat side of your knife or a mortar and pestle to release their oils—this makes a real difference in flavor. Sounds weird, but it works: your broth will taste richer, not just "garlicky."
Dietary considerations for this boiled chicken legs
Gluten-Free Adaptations
This recipe is naturally gluten-free as written, but always double-check your salt and broth additives. I use Diamond Crystal kosher salt which is certified gluten-free, but some store brands may contain anti-caking agents with gluten.
For extra safety, opt for a dedicated gluten-free salt like Morton Gluten-Free Kosher Salt. The cooking process itself requires no gluten-containing ingredients, making it perfect for those with celiac disease or gluten sensitivity. 🌾
Low-Sodium Options
If you're watching your sodium intake, reduce the kosher salt to ¼ cup and compensate with 1 tablespoon of liquid smoke (like Traeger Original) added to the broth during the final simmer. This adds depth without excess salt.
Alternatively, use no-salt-added chicken broth (like Swanson No Salt Added) instead of water for the base, then add just 2 tablespoons kosher salt to the brine. Always taste the broth before serving—it should be flavorful but not overwhelming.
Dairy-Free Considerations
This recipe naturally avoids dairy, but if you're serving it with sides, be mindful of common dairy-containing accompaniments.
I recommend pairing with roasted sweet potatoes (tossed in olive oil and smoked paprika) or a creamy garlic aioli made with vegan mayo (like Hellmann's Vegan) and Greek yogurt alternatives (like Silk Almond Yogurt).
The lemon-infused broth also works beautifully as a base for a dairy-free gravy—simply whisk in 2 tablespoons cornstarch and ½ cup coconut milk for richness.
Allergen-Friendly Swaps
For nut allergies, avoid any garnishes containing almonds or cashews. If you're accommodating egg allergies, skip any egg-based sauces and focus on the natural flavors of the chicken and broth. For soy allergies, ensure your kosher salt doesn't contain soy-based anti-caking agents (check labels).
I always keep Kosher salt from Redmond Real Salt on hand—it's certified allergen-free and has a clean mineral profile. The recipe's simplicity makes it naturally adaptable to most dietary restrictions with minimal adjustments. 💡
Poultry Allergy Notes
This recipe is not suitable for those with chicken or poultry allergies, as it's based on chicken legs. However, the cooking technique can be adapted for other proteins like duck legs or turkey thighs using the same brining and simmering method.
If you're accommodating severe poultry allergies in your household, consider making this recipe in a dedicated allergy-free kitchen area where cross-contamination is minimized. Always use separate utensils and cookware for allergen-free preparations. 🚫
Nutrition facts
Frequently asked questions
Why do I need to brine the chicken legs before boiling?
The 30-minute brine with kosher salt is essential for two reasons: it prevents the meat from drying out during cooking and helps the skin stay silky rather than rubbery. The salt breaks down proteins on the surface, allowing moisture to be retained even after prolonged simmering. Skipping this step often results in tough, dry meat—especially important for chicken legs where the skin can become leathery if not properly prepped.
What's the best way to tell when the chicken legs are fully cooked?
Use a meat thermometer to check the internal temperature at the thickest part of the thigh—it should reach 165°F. The meat should also pull apart easily at the joint with minimal resistance when pierced with a fork. The skin will look slightly wrinkled and opaque rather than translucent. If you don't have a thermometer, cut into one leg to verify—juicy pink meat with no resistance means it's done.
Can I use chicken thighs instead of drumstick-thigh combos?
Yes, but you'll need to adjust cooking times slightly. Bone-in, skin-on thighs typically cook 10-15 minutes faster than drumstick-thigh combos because they have less bone mass. Start checking for doneness at 45 minutes total simmering time instead of 60 minutes. The skin will crisp better on thighs since they have more fat, but monitor closely to avoid overcooking.
What should I do if the skin turns out tough or rubbery?
Rubbery skin usually means one of two things: either the chicken wasn't brined long enough or it was overcooked. For next time, extend the brining to 45 minutes and reduce the final simmer time by 5 minutes. If it's already happened, try pan-searing the cooked legs skin-side down in butter for 2 minutes to restore crispness. The meat will still be tender underneath—just the skin needs a quick fix.
How can I use the leftover cooking broth?
The flavorful broth makes an excellent base for gravy, rice dishes, or even soups. Strain it through a fine-mesh sieve to remove any remaining particles, then reduce it by half on the stovetop for gravy. For extra richness, whisk in 2 tablespoons cornstarch with 2 tablespoons cold water per cup of broth. You can also freeze the broth in ice cube trays for future use—just thaw and reduce as needed.